Skip to product information
1 of 1

Interior Essentials Kit - Lighting, Organization & Power Bundle

Interior Essentials Kit - Lighting, Organization & Power Bundle

Regular price $190.95 USD
Regular price Sale price $190.95 USD
Sale Sold out
Tina R.

It’s the perfect all-in-one kit for any job site, ranch, or storage container owner.

In stock. Fast free shipping delivered in 2-5 business days

Complete Project Solution

Off-Grid Container Operation

Solar-Powered Container Efficiency

Commercial-Grade Container Accessories

ISO Container Compatibility

High-Strength Construction

Description

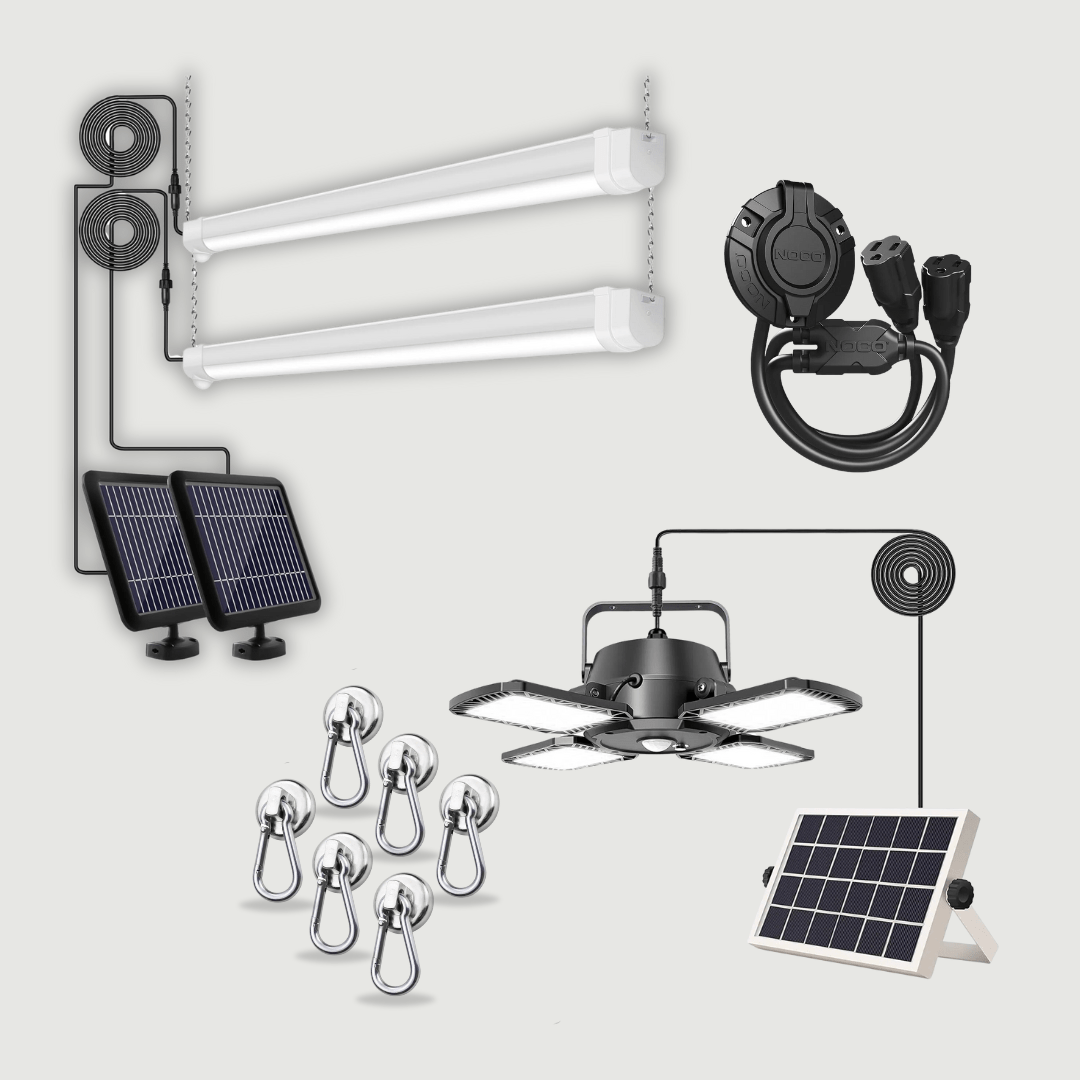
Instant interior setup for your container: bright lighting, secure magnetic hooks, and easy power access. Our #1 most frequently bought-together bundle.

Transform Your Container Interior in Minutes

The Interior Essentials Kit combines our most frequently purchased-together items—lighting, mounting, and power—into one easy, high-value bundle.

Designed based on real customer ordering patterns, this kit gives you the exact accessories people use to organize, brighten, and power their shipping containers.

WHAT’S INCLUDED

  • Magnetic Hooks (6-Pack)
    Heavy-duty magnetic hooks perfect for tools, cords, bags, and mounting lights.
  • Workshop Lights (2-Pack)
    Ultra-bright LED lights with long lasting solar charged battery.
  • Power Outlet Splitter
    Bring power to you container - Expand a single outlet into a multi-device power hub.
  • Optional Upgrade: Solar Fan Light
    Improve airflow & lighting without wires.

WHY CUSTOMERS LOVE THIS KIT

  • Super easy installation
  • Create instant workspace lighting
  • Organize cords, tools & equipment
  • Perfect for job sites, ranches, workshops & storage use
  • Modular: add more hooks or lights anytime
  • Ships fast from USA

BUNDLE VALUE

Individually: $263.40
Bundle Price: $237.06
You Save: $25.45

How to use

Workshop Lights Installation

Step 1: Choose Your Solar Panel Location

  1. Find a location on either the roof or the side of your shipping container that receives maximum sunlight throughout the day.
  2. Ensure the location allows the wire to easily reach the interior of your container where you plan to hang the lights.

Step 2: Mount the Solar Panel

  1. Hold the mounting bracket against the container at your chosen location.
  2. Using a power drill and the provided hardware (screws), secure the bracket firmly into the container shell.
  3. Attach the solar panel to the bracket.
  4. Pro-Tip: Utilize the built-in adjustable range on the bracket to angle the panel directly toward the sun for optimal year-round charging.

Step 3: Route the Wiring Into the Container

  1. Drill a small hole through the roof or the side of the container near the mounted solar panel.
  2. Feed the solar panel’s power wire through the hole and into the interior of the container.
  3. CRITICAL STEP: To prevent leaks and weather damage, completely seal the drilled hole from the outside using a standard exterior-grade silicone sealant or caulk.

Step 4: Mount and Connect the Workshop Lights

  1. Take the two interior workshop lights inside the container.
  2. For maximum brightness and coverage, it is recommended to mount the lights along the vertical axis of your container's ceiling/walls.

Plug the solar panel wire directly into the corresponding connectors on the lights.

Power Outlet 2 cord splitter Installation

Step 1: Cut the Access Hole

  1. Select an accessible exterior location on your shipping container wall near where you plan to draw power.
  2. Equipping a power drill with a 2-inch hole saw (circle cutter), drill straight through the steel container wall to create a clean pass-through opening.
  3. Deburr and smooth out any sharp edges around the newly cut 2-inch circle.

Step 2: Feed and Align the Socket

  1. From the outside of the container, feed the integrated power wire attachment tail-first completely through the 2-inch hole and into the container interior.
  2. Push the power inlet housing forward until the integrated rubber waterproofing gasket sits flat and flush against the exterior steel container wall.
  3. Level the socket face vertically to your exact preference.

Step 3: Fasten and Tighten the Hardware

  1. Locate the three pre-molded mounting holes surrounding the perimeter of the inlet housing.
  2. Using a power drill, drive three heavy-duty self-tapping screws directly through the mounting holes and into the container steel.
  3. CRITICAL STEP: Tighten the three screws completely snug. This firmly compresses the built-in rubber face gasket against the corrugated steel wall, generating an airtight, completely waterproof seal that blocks out rain, moisture, and pests without needing extra caulk.

Step 4: Hook Up Your Power Source

  1. On the Outside: Flip open the protective spring-loaded exterior cover, insert any standard household extension cord running from your primary power source, and close the outer shroud as far as possible over the connection.
  2. On the Inside: Walk into the container and locate the wire attachment you fed through in Step 2. You can now immediately plug in any traditional 3-prong device, power strip, or tool directly into this internal line.
View full details

Upgrade Your Container's Interior

Bundle

The parts you need for your shipping container project

Off-Grid Ready

Ideal for remote container setups without traditional power access

Solar Powered

Uses solar energy for reliable off-grid operation

Professional Grade

Designed for professional shipping container applications

Built for Containers

Compatible with most standard ISO shipping containers

Durability

Engineered for superior structural integrity and reliability

What Our Customers Say

  • Tina R.

    It’s the perfect all-in-one kit for any job site, ranch, or storage container owner.

  • Marcus G.

    I love that this kit uses real customer buying patterns because it truly includes the exact interior essentials you need.

  • Rebecca L.

    These shelves were easy to install and are very solid and sturdy. After buying and installing the first set we purchased another set for more storage!

  • Lonnie O.

    I did not realize I would have to assemble the bracket but it was an easy assembly and hang using the D-ring. I should have purchased two sets in the beginning. The brackets are sturdy and work well in my 20foot container.

  • Lucas P.

    This bundle has everything you need to turn a dark, empty metal box into an efficient workspace in minutes. The solar workshop lights are ultra-bright, and the heavy-duty power splitter lets us run all our tools and chargers simultaneously.

1 of 5

Questions About Products?

Whether you need more details, have a specific use case in mind, or just want to make sure you're choosing the right accessory — submit your question below and a member of our team will get back to you shortly.