
Brandon T.
This combo completely solved our condensation issues while giving us great interior visibility without any wiring.


Fix heat, condensation, and airflow problems while adding interior lighting for a safer, more comfortable workspace.
The Ventilation & Comfort Combo solves two major container problems at once:
Poor airflow
Low interior visibility
This bundle includes a solar vent + magnetic hooks + interior lighting.
All items were chosen because they frequently appear together in customer orders.
Retail (all items separate): $296.97
Bundle Price: $267.27
Your Savings: $29.70
This combo completely solved our condensation issues while giving us great interior visibility without any wiring.
Couldn't load pickup availability
In stock. Fast free shipping delivered in 2-5 business days
Complete Project Solution
Solar-Powered Container Efficiency
Heavy-Duty Steel Construction
Commercial-Grade Container Accessories
Weather-Resistant Container Design
Long-Lasting Performance
Fix heat, condensation, and airflow problems while adding interior lighting for a safer, more comfortable workspace.
The Ventilation & Comfort Combo solves two major container problems at once:
Poor airflow
Low interior visibility
This bundle includes a solar vent + magnetic hooks + interior lighting.
All items were chosen because they frequently appear together in customer orders.
Retail (all items separate): $296.97
Bundle Price: $267.27
Your Savings: $29.70
Place the foam gasket so that the circle is centered over a raised, flat rib on your container
Using the gasket as a stencil, trace a the inner circle using a marker to form your cut out shape
Tip: Choose a spot on your container's roof that gets maximum sunlight throughout the day
2. Cut the hole
Using the cutting disc with your cut-off wheel tool, cut through the container following the shape you drew in previous step
Use grinding disk with cut-off wheel tool to smooth out any edges and even out your circular hole
Tip: Watch out for flying sparks / metal shavings!
Using the cutting disc with your cut-off wheel tool, cut through the container following the shape you drew in previous step
Use grinding disk with cut-off wheel tool to smooth out any edges and even out your circular hole
Tip: Watch out for flying sparks / metal shavings!
3. Place your foam gasket
Place your foam gasket over the hole you've cut and cover it with the 10W Solar Powered Shipping Container Roof Vent.
4. Mount the vent
Using either the included self tapping screws or rivets, secure the vent to the container roof.
Using self-tapping screws will require some down ward force to get them to catch and screw into the thick container steel
Using rivets, you will need to pre-drill holes through the container roof to insert the rivets into
Fasten chosen hardware to secure the vent to the container roof, creating a water tight seal
5. Optional: Apply additional silicone based sealant to seams and hardware to increase water resistance
That's it! Once the solar panel receives sunlight, your fan will start spinning, pulling out excess heat and moisture from your container!
Solar Powered Fan-shaped Light Installation:
Step inside the container and pick a central location on the ceiling or structural ribs to maximize your light coverage.
Use the included mounting bracket to hang the fan-shaped lighting fixture flush to the ceiling.
Plug the solar panel's drop-down wire directly into the receiver socket on the light fixture.
Pro-Tip: While designed as an indoor overhead light, the rugged design means you can also mount this fixture on the outside of your container to illuminate an outdoor loading area if you prefer.

Ventilation & Comfort Combo - Solar Vent + Magnetic Hooks + Light
Default Title

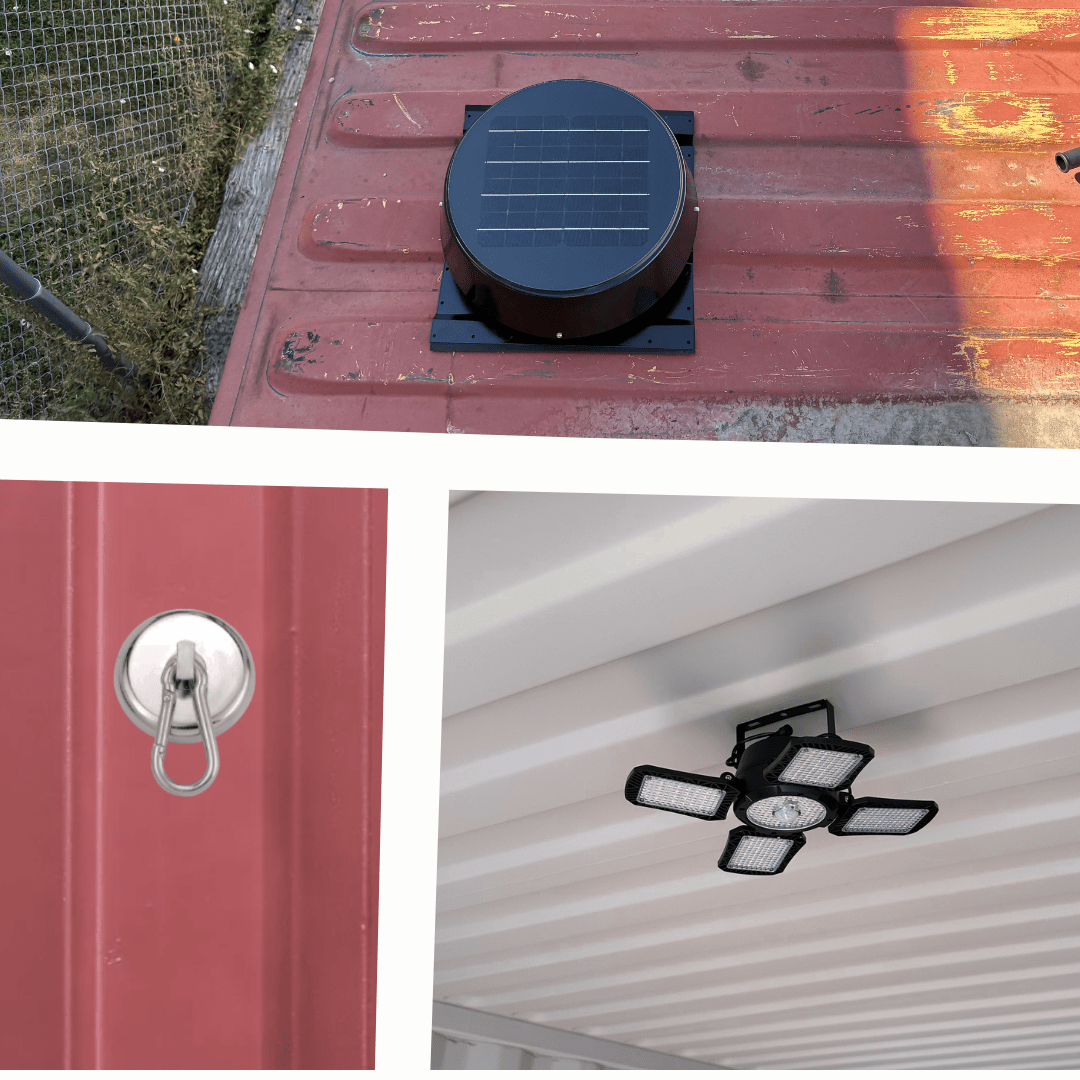

Bundle
The parts you need for your shipping container project

Solar Powered
Uses solar energy for reliable off-grid operation

Durability
Constructed from thick, heavy-duty steel for maximum strength

Professional Grade
Designed for professional shipping container applications

Weatherproof
Built to withstand rain, snow, heat, and harsh outdoor conditions

Rugged Construction
Durable construction helps withstand repeated daily use
This combo completely solved our condensation issues while giving us great interior visibility without any wiring.
It wasn’t too hard to install and works well for venting my air conditioner. It’s strong and attractive.
Fast delivery, easy to follow installation guide lines, great ventilation for my container…Thanks
These vents are very well made and easy to install using the supplied template.
The vent drastically reduces the summer heat inside, and the solar workshop lights are bright enough to let us safely work well after dark.
Questions About Products?
Whether you need more details, have a specific use case in mind, or just want to make sure you're choosing the right accessory — submit your question below and a member of our team will get back to you shortly.